I’ve been doing some work recently with 4D Systems who’re based in Australia and who design some really cool LCD and oLED touchscreen display modules.
The displays themselves have an on-board graphics processor that is designed to take the load off the host processor and gives you a high-level command set to enable you to interact with the display in a very easy to use fashion.
And recently they have introduced a range of displays and an adapter for the Raspberry Pi.
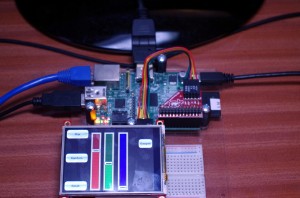
The photo shows one of their displays (The uLCD 32PTU) with the Raspberry Pi serial adapter.
The adapter board just breaks-out the serial port and the power for the display itself. It leaves all the other GPIO pins available for you own use.
The intelligent part inside the displays comes from the software you use to setup the displays in the first instance – in that picture above, the buttons and sliders were not drawn by the Pi, but are created using a GUI development system called Visi-Genie. This runs under the 4D Systems “Workdshop4” package. You design the display using high-level constructs – build the software that runs on the display – this involves copying data to a Micro-SD card on the display itself, then connect the display to the host computer.
Workshop4 runs under MS Windows, but once programmed the display can connect to any suitable host with the right adapter.
So the process involves designing the display, then connecting it to the host and writing some software to run on the host to interact with the display… And that’s what I’ve been doing – I’ve produced a handy library to help you use the dsiplay from C/C++ programs (it should be easy to use from other languages too – e.g. Python).
At its simplest, you periodically poll the display, and get back a structure containing a message from it. The message might contain information such as “Button 5 pressed”, “Slider 3 moved to position 24”, “Key ‘a’ pressed on keyboard 2”, and so on, or you can send a message to the display: “Set meter 3 to 25”, “Move slider 1 to 0”, etc. The display handles all the animations of the buttons, sliders, gauges, dials and so-on leaving your program to get on with (hopefully!) more important things.
Using this system I was able to write a program on the Pi to have an on-screen slider control the brightness of an LED using a slider on the screen in just a few moments with only a few lines of code.
Have a look at this video to see how it all goes together (and I suggest you pick HD and full screen!)
I’ll be writing more on these displays as I get to grips with them, so keep watching!

