
Some time back the boffins at Pimoroni sent me a prototype of the new Pibrella board with a view to making the little piezo speaker on it make some noise… It wasn’t that loud, so I made a few suggestions then… Last Wednesday, almost as I was leaving for the Manchester Pi Jamboree the production version dropped through my door, and here it is!
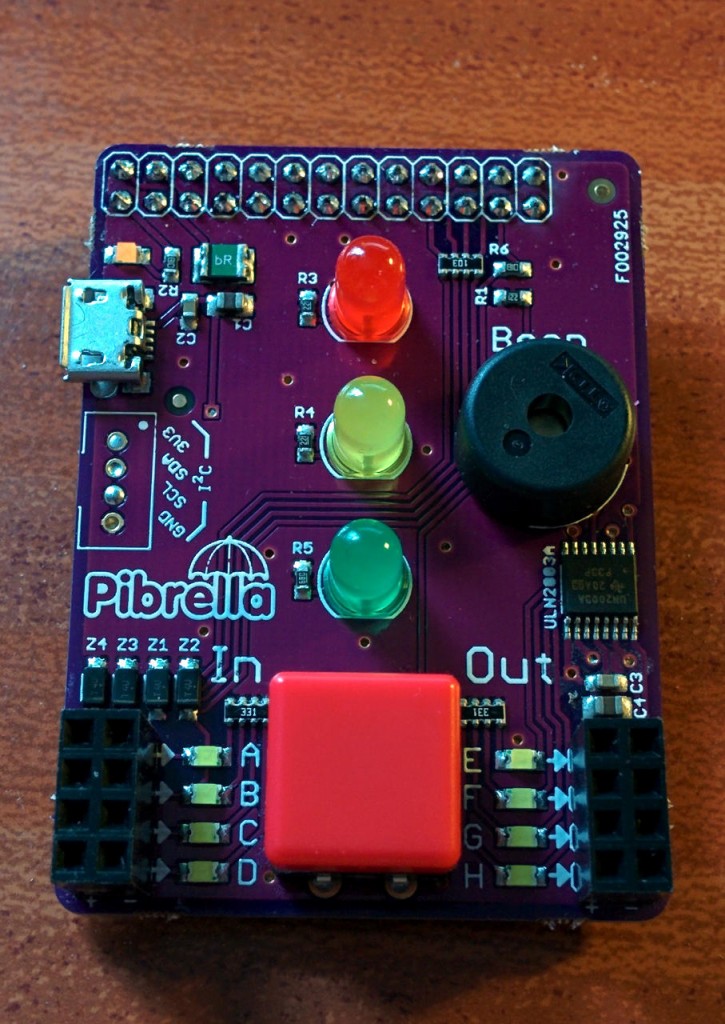 It’s a tiny little board that fits on-top of the Raspberry Pi aimed at helping to teach programming using some big LEDs and a button to help make it more exciting.
Features
- 3 Large LEDs; Red, Yellow and Green
- A Big Red button! (Everyone needs a Big Red Button!)
- 4 Inputs – which have a degree of protection on them via a resistor and zener diode with LEDs to indicate the input state.
- 4 outputs – which are Open Collector outputs from a ULN2003 open collector driver chip, also with LEDs to indicate their state.
- A piezo buzzer which can generate tones, notes and other little squawks.
- Its own website here: http://pibrella.com/
It’s also purple which is their trademark board colour (as used in the PiGlow too, and who knows what in the future)
It’s aimed at helping to teach programming and simple GPIO use.
From the Pi’s GPIO point of view, it’s just simple outputs and inputs, so I didn’t think it warranted a special wiringPi devLib driver (unlike e.g. the PiGlow), but I have put together a nice header file for use in your C programs with all the input and output definitions and written a few test program for it in C and BASH, so if C is your thing, then read on. (If not, then read on anyway, you might get some ideas!)
You can fetch and compile my code and files as follows:
git clone git://git.drogon.net/pibrella
cd pibrella
make
All these examples will require the wiringPi libraries installed. Get them here.
The key part of all this is the file: pibrella.h. This contains all the pin definitions and some functions to help you use the Pibrella board from your C programs using wiringPi.
Please do look at the sources for the various programs here to find out how to use it effectively.
The examples I’ve provided are:
- tune – Plays a well knows tune!
- ladder – my old ladder game altered for the Pibrella board
- tuxx.sh – my old Tuxx (Pelican) road crossing simulator
- stepper – how to drive a micro stepper motor directly from the Pibrella.
- step1 – Drive a stepper motor one step at a time using the Big Red Button.
- wire – classic wire loop agility game – move the wire loop along the bendy wire without touching it. Three touches and you’re out!
Tuxx/UK Road Crossing
Start with tuxx.sh – it’s a simulation of a UK “pelican” road crossing, written in BASH using the wiringPi GPIO command. Run it as follows:
./tuxx.sh
It will initialise and start with the Green LED on and the “red man” (top LED in the block of 4 white LEDs on the right) on. That means traffic can go, pedestrians should not walk.
Push the button and the sequence will start – Green, Yellow, Red to signal the traffic to stop, then the red man will change to the green man (bottom LED in the block of 4 white LEDs on the right) and the beeper will beep. After the allotted time, the sequence will change to flashing green man and Yellow, then red man and Green to allow traffic to pass again.
Tunes/Notes
The tune program is just a demo of using and making tones with your own software. Run it with the usual:
sudo ./tune
and name that tune…
I will warn you now; the sound quality isn’t great. It’s a very small piezo device with some resonant frequencies that don’t quite match playing musical notes…
Ladder
This is my old ladder game. You start off at the bottom and have to climb to the top. The bottom LED will flash and to climb, you push the button. However you can only push the button down while the LED is on. If you push it while it’s off, then you fall to the bottom again. When you get to the top (the Red LED) then you win! Note that the closer to the top you get the harder it becomes… You may need to push the button 2 or 3 times to jump just one LED, but don’t keep it pushed, or back to the bottom you’ll go!
Run it with:
sudo ./.ladder
and enjoy the fun.
Stepper Motors
The uln2003 open collector driver chip on the Pibrella is capable of driving one of the little micro stepper motors (e.g. 28BYJ). You’ll have to make up some more wires as these usually come with a socket designed for a PCB plug:
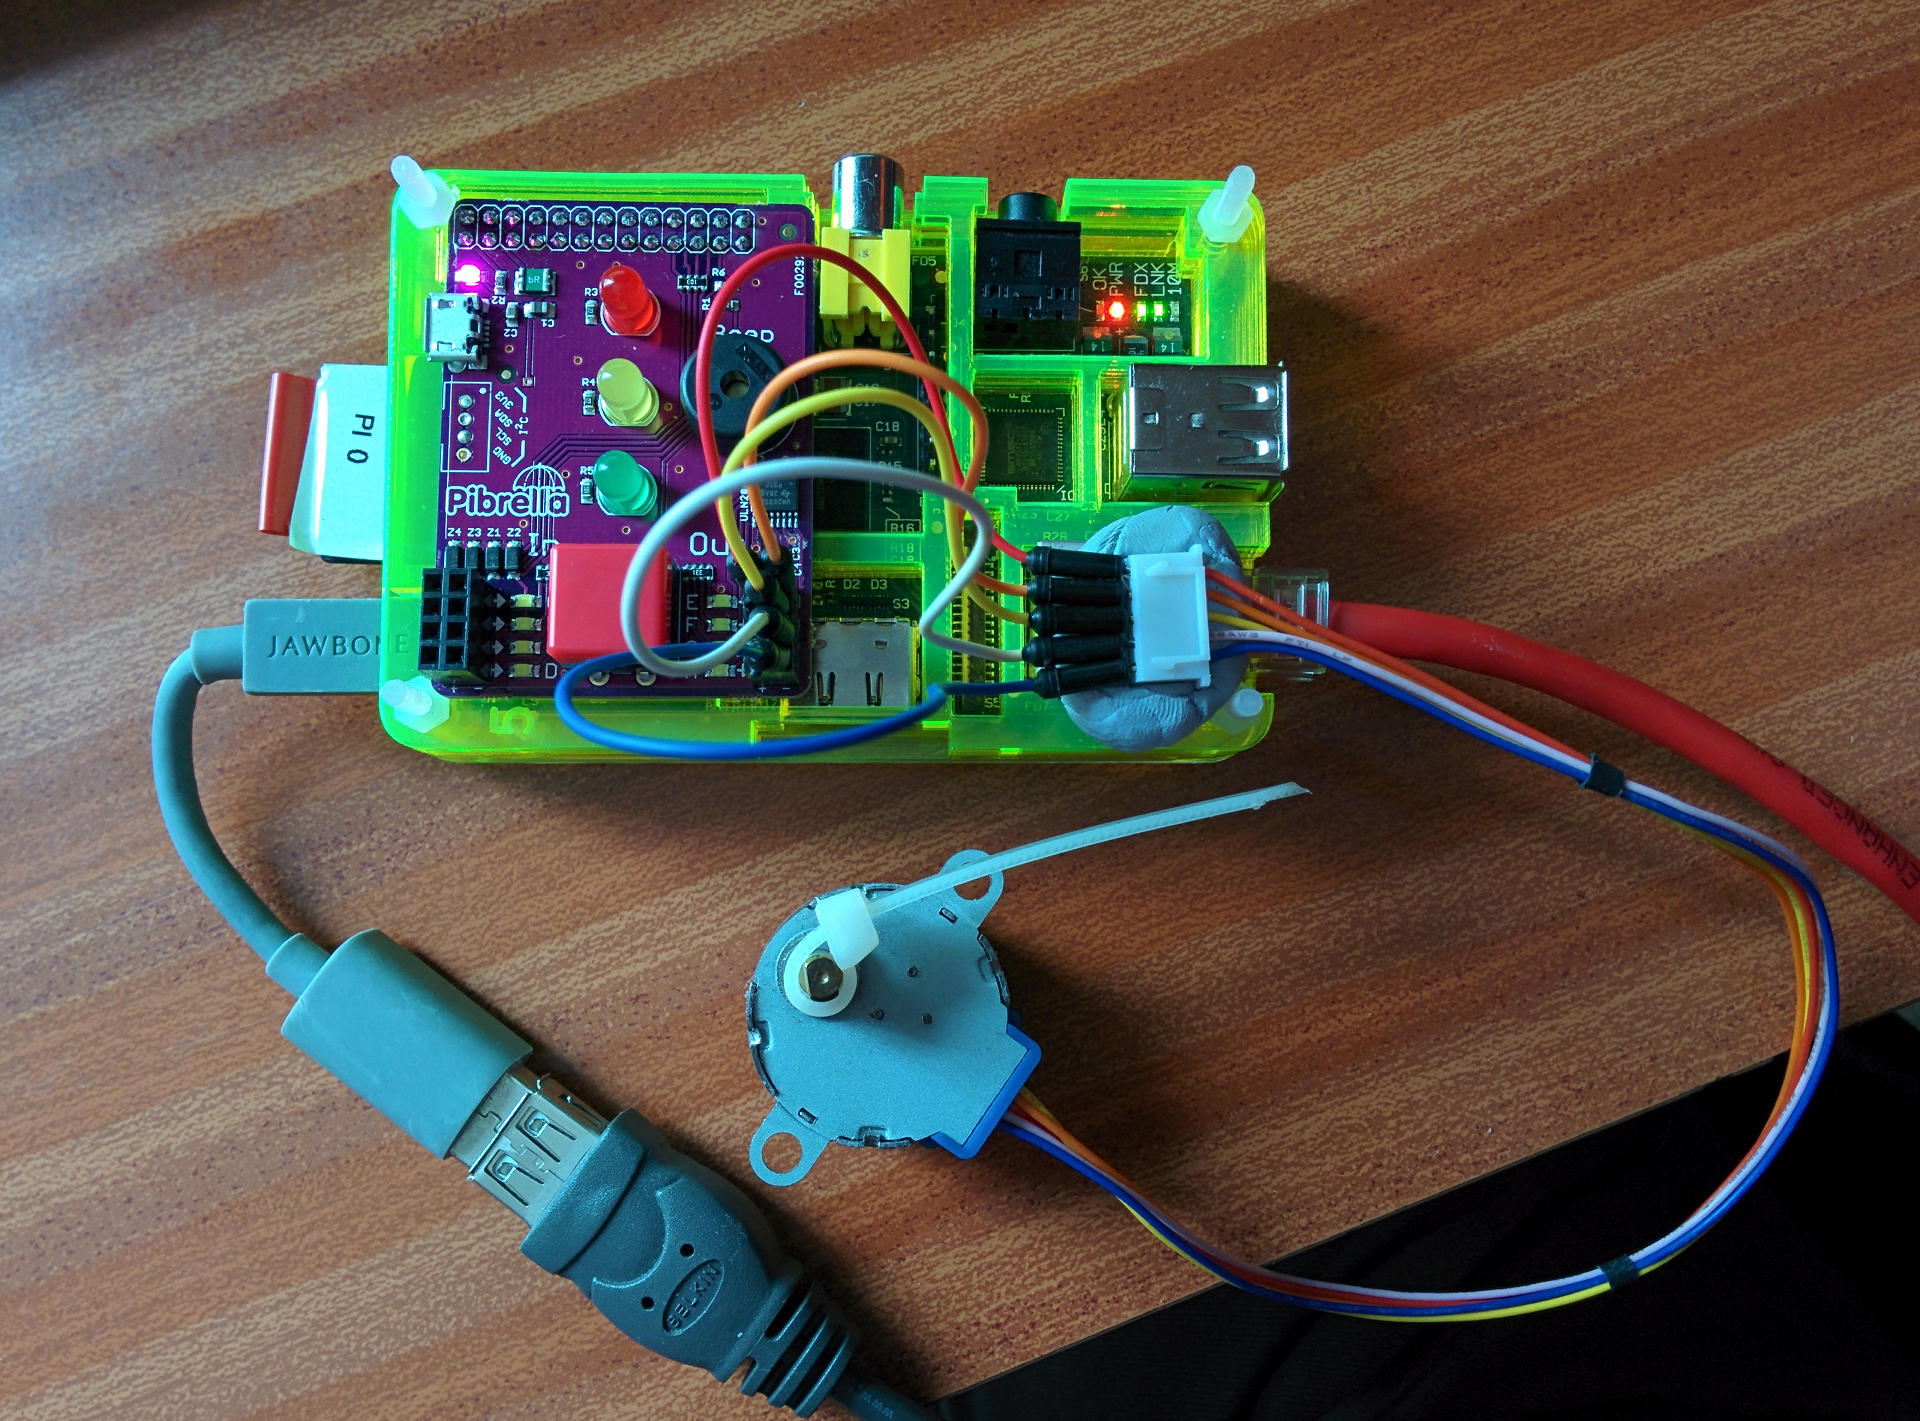 The photo shows how its wired up. The stepper motor has wires coloured Red, Orange, Yellow Pink and Blue. These go via male to male jumpers into the Pibrella in the same order for the Orange, Yellow, Pink and Blue – from top to bottom on the outermost set of 4 pins on the right-hand connector. The Red wire from the stepper goes to one of the 4 innermost pins on the right-hand connector (This is the +5v supply). Note that I didn’t have a pink jumper lead, so I used a white one here.
I’ve written 2 little programs, one; stepper simply makes it do a full turn one way, then a full turn the other, and the 2nd; step1 uses the button to advance the motor one step at a time. You can see which outputs are active on the 4 little white LEDs as the motor turns. (It’s 4096 pulses per full turn, so be patient if you want to make it go a full turn!
Wire
This is the classic steady-hand wire-loop game. Your task is to firstly make it, and secondly to guide the wire loop over the curvy wire to the other end without touching the wire!
I made up a very small version just for demonstration:
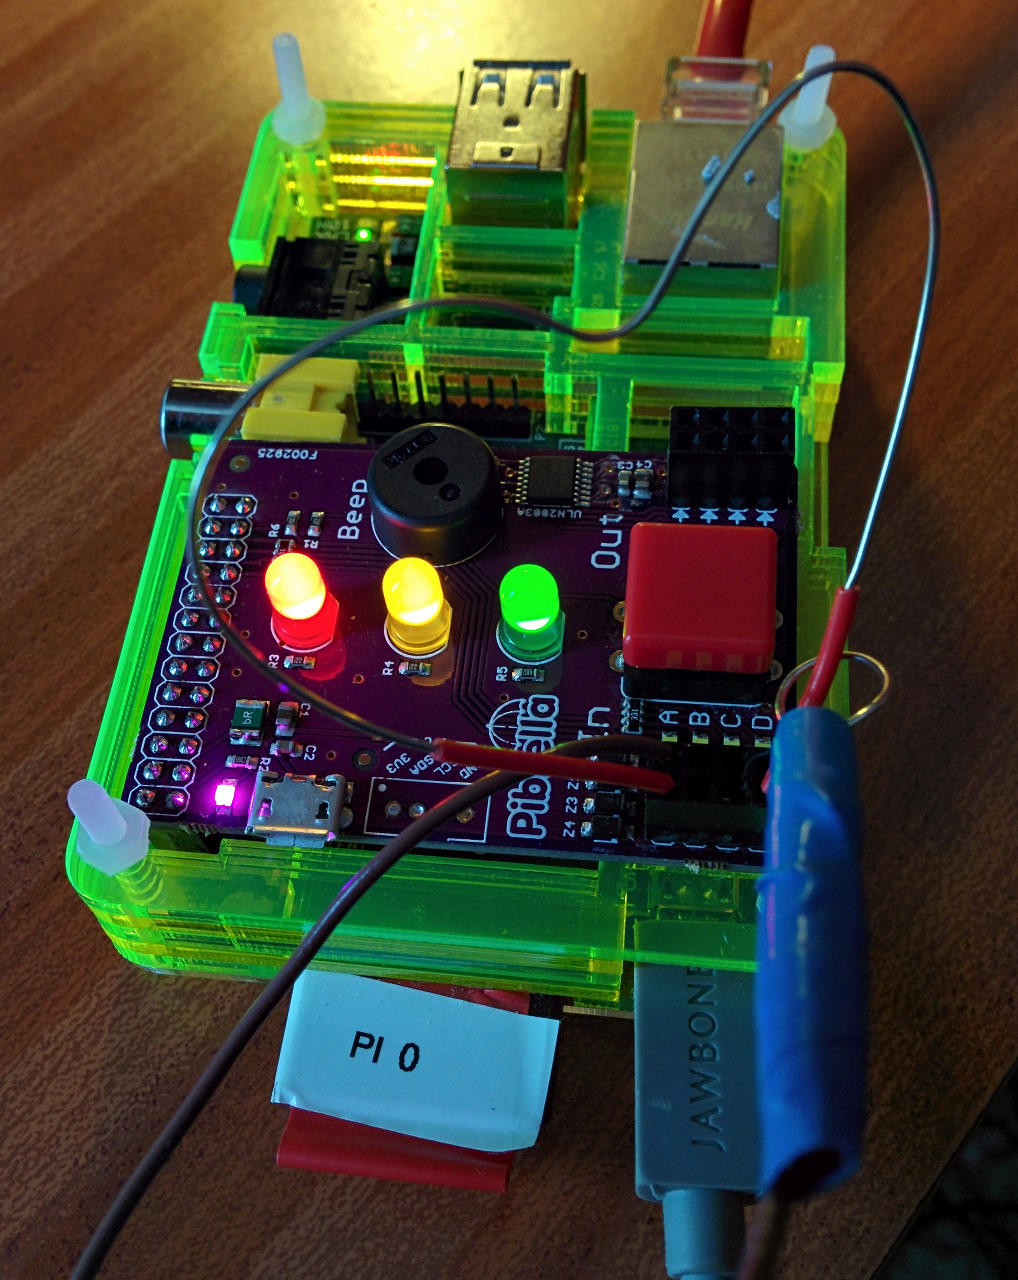 The bendy wire (with red insulation at the ends) is plugged into the top and bottom of the outside column left-hand connector. (All these pins are at 3.3v). The wire loop you hold is plugged into the innermost connector on the same block marked “A”
We run the program:
sudo ./wire
and off we go. The program initially waits for the wire to be clear, then the game starts. You are allowed three touches of the wire which will be accompanied with a beep and one of the LEDs lighting (starting with Green and ending with the Red one), and on the fourth touch it’s game over. The Big Red Button can be used to reset the game at any time.
Summary
The Pibrella board is a fun little board that can be used on its own, or in conjunction with many other little projects – you just need to get thinking and get programming! Python and Scratch libraries are available and now this lets you program in it BASH, C or anything else that supports wiringPi – e.g. BASIC.