
One of the features of the new Raspberry Pi B+ is improved power handling – particularly round the USB interfaces. There is a device connected to the power to the USB ports that is quite clever – it controls the power and “soft starts” the peripherals plugged in. This helps to reduce any brown-outs on the main Pi supply, so reducing the chance of the Pi rebooting when you plug in a USB peripheral with the Pi turned on.
Additionally, it can also limit the total current drawn by the USB peripherals. This is 600mA by default, but can be increased to 1.2A via software.
Warning: DO NOT do this on a whim. Only do this if you are absolutely sure that you need to do it!
But if you do need it, then “How?” I hear you ask… Well, simple… There are 2 ways.
The first way is via a new option in /boot/config.txt. Currently you can add:
safe_mode_gpio=4but note that this will become:
max_usb_current=1in subsequent updates. To do that requires a reboot of your Pi, however there is a 2nd way and that’s in software – because the actual switch is controlled via the Pi’s GPIO, we can do it from the command-line after the Pi has booted:
BCM_GPIO pin number 38 is the magic control pin.
Using the wiringPi gpio command, you can do the following:
gpio -g write 38 0
gpio -g mode 38 out
You may think I’m doing this the wrong way round, but you want to make sure you’re not switching it high accidentally, so we make sure the output is going to be low when we force the pin to output mode, and low (or 0) is the default 600mA limit.
To increase the limit to 1.2A:
gpio -g write 38 1
The next version of wiringPi will feature a built-in function of the gpio command to read and set the USB current limiter, but for now, if you need to set it high, then that’s what you can do.
And as always please make sure you use a good quality power supply for your Pi! I’ve seen more problems caused by people using cheap wall-warts that can barely power a Pi, let alone any USB peripherals.
My test rig for this involved getting my B+ to power 2 other Pi’s via the USB ports on the B+. With the default 600mA setting, the Pi’s would not boot – they powered up, tripped the limiter which powered them down again for a second or 2, then the process repeated. With the limit set to 1.2A they both powered up and booted at the same time without a hitch.
I really don’t recommend you do this – or if you do something similar, don’t let it run too long. Also, keep an eye on the Red power LED – if you see this flickering it means that something is causing the power supply to “brown out”. Hopefully not enough to reboot the Pi, but it’s something to watch out for when you plug USB peripherals in
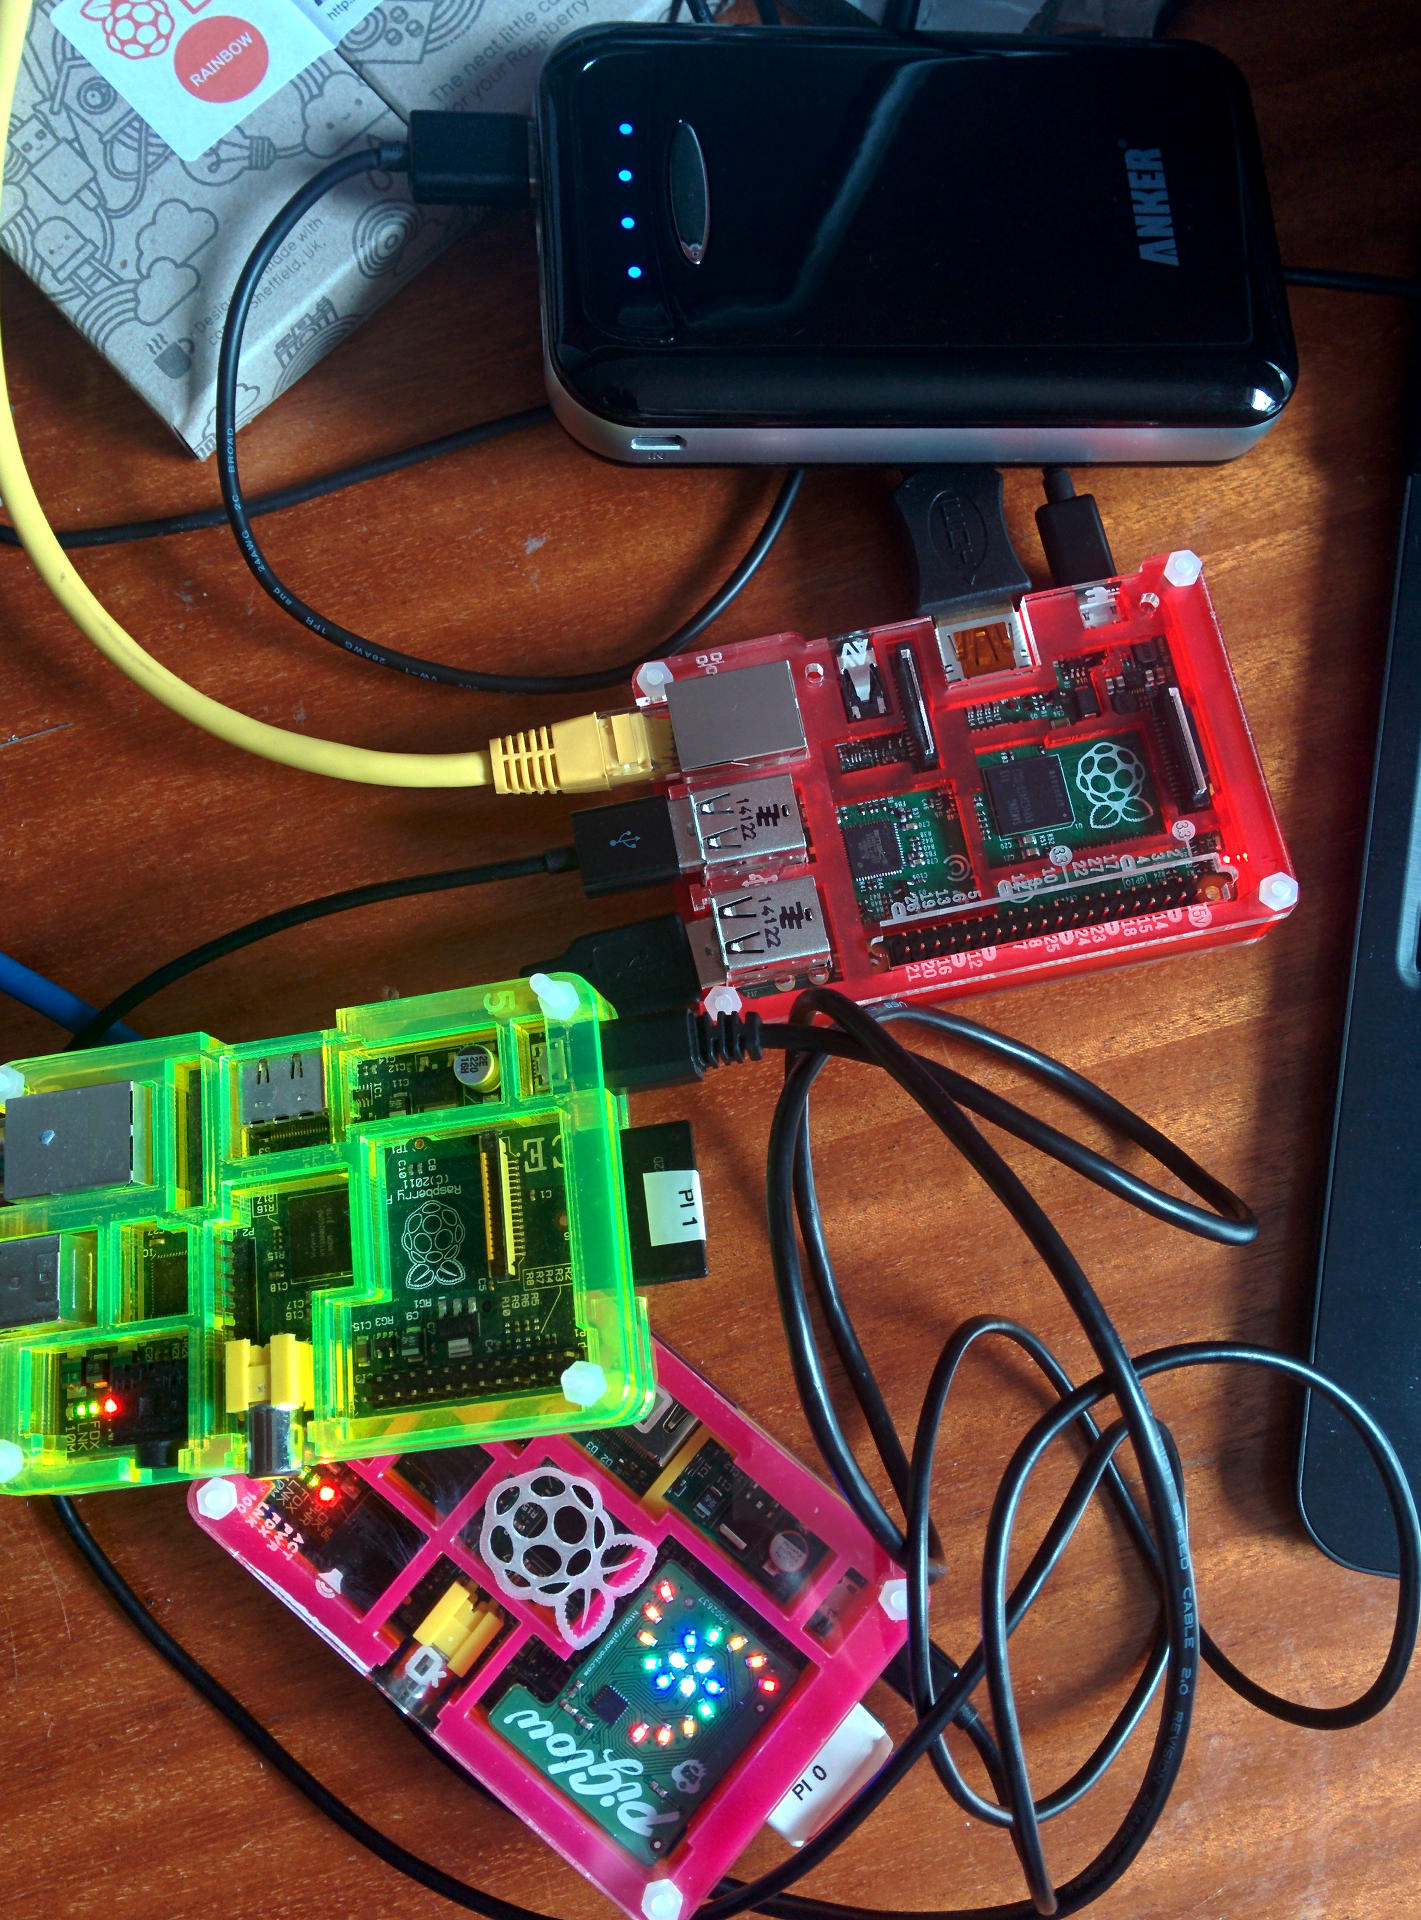 Excuse the somewhat chaotic nature of this photo – just trying to cram everything in. The B+ is being powered by an Anker 15,000mAh USB battery charger unit – it was the first 2A PSU I had to hand … Works a treat!